

Theme 6 - Sacrifices
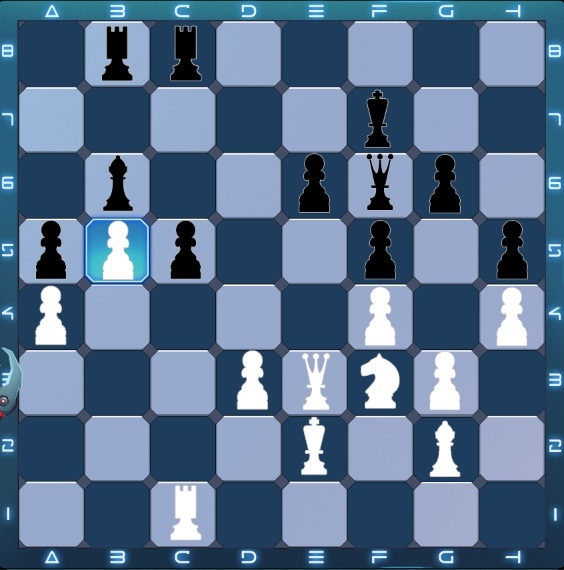
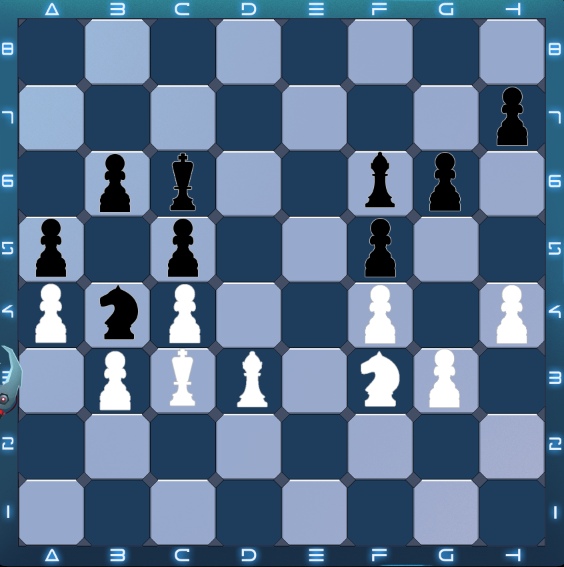
Sacrifice No. 1 (The pawn sacrifice)
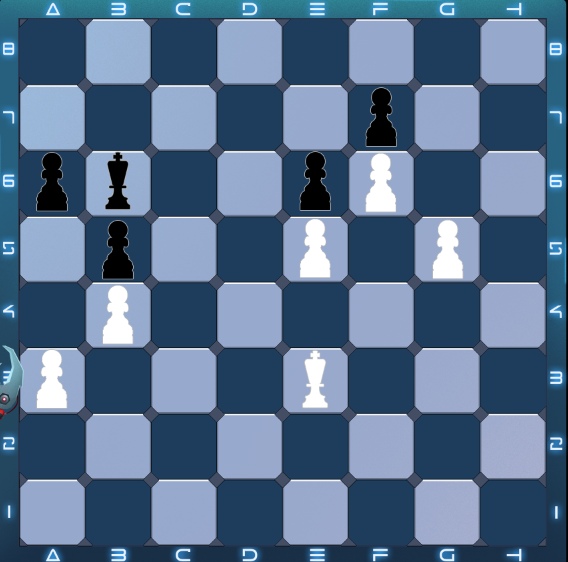
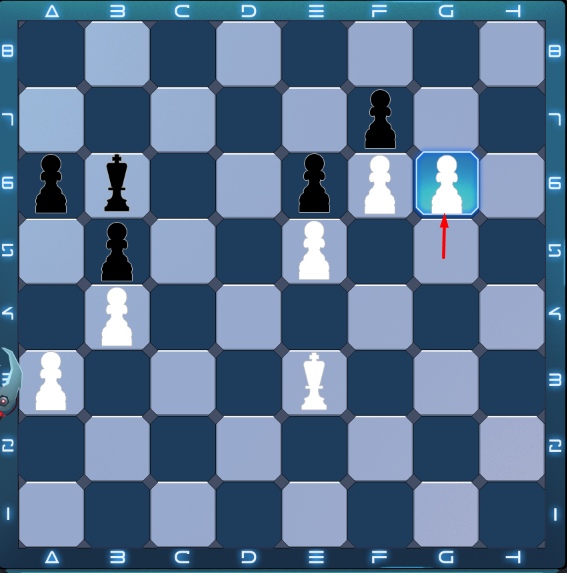
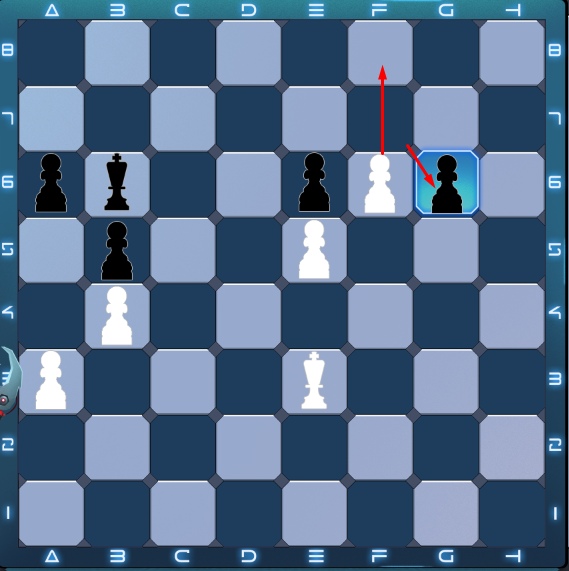
Everything is pretty simple here. White sacrifices their pawn, since in the future it is assumed a positional advantage for another pawn:
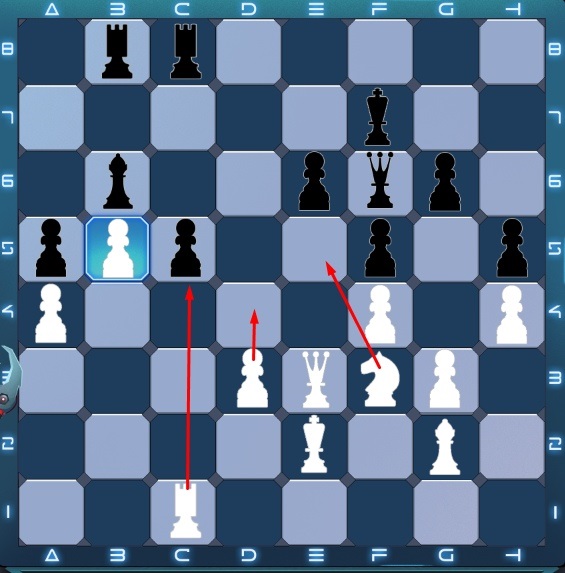
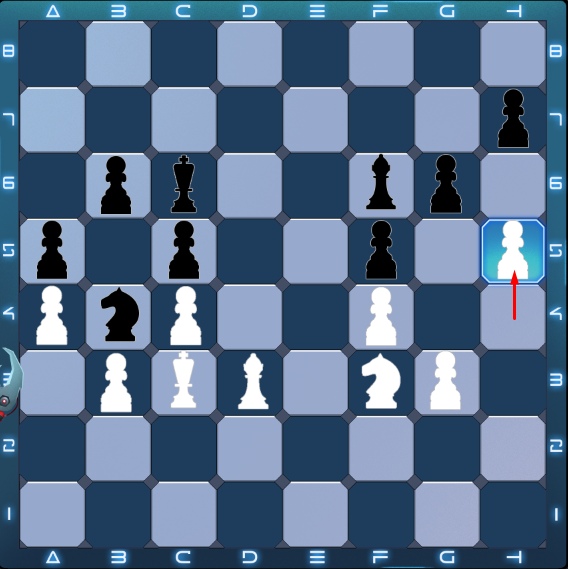
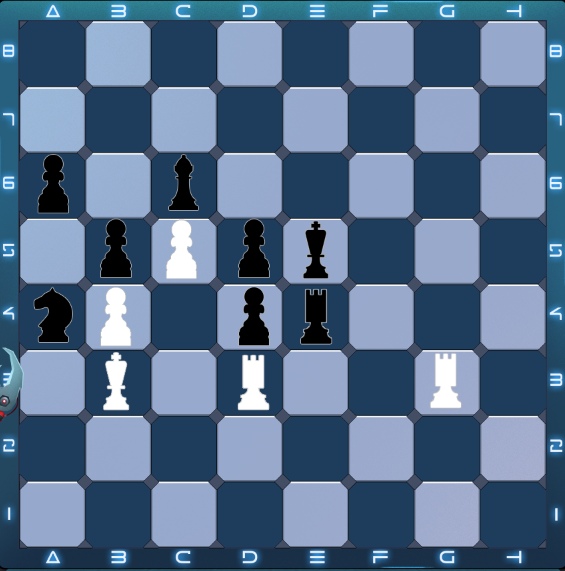
Sacrifice No. 2 (The rook Sacrifice)

Below is one of the very common options for sacrifice:
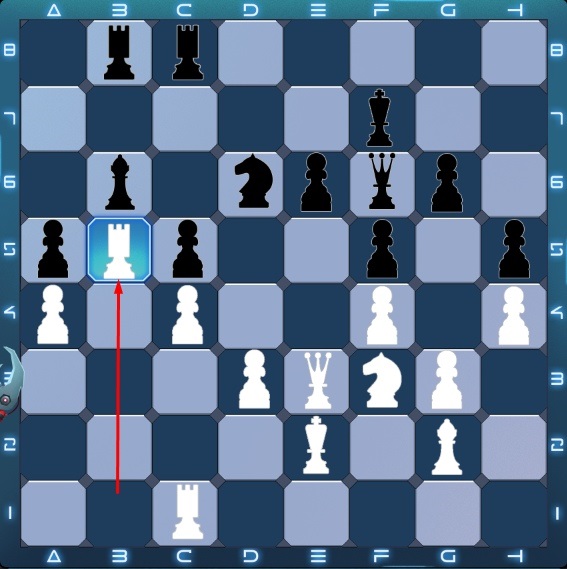

Now that Black has taken the rook with his knight, White has opened up several interesting possibilities:
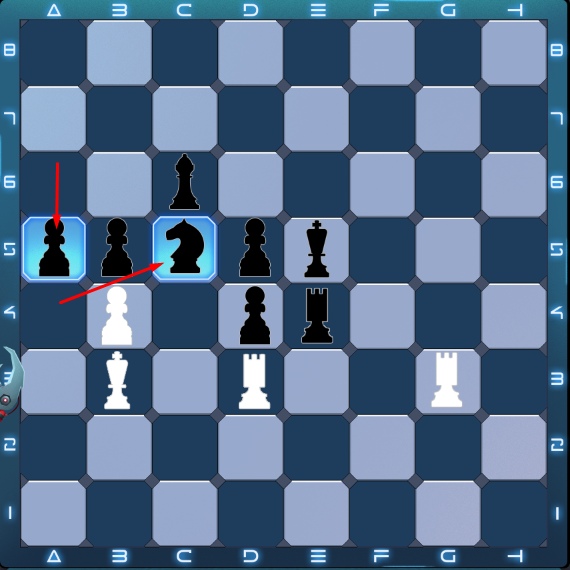
White's passed pawn becomes protected. A pawn on a yellow square is not surrounded by enemy pieces and cannot reach the extreme horizontal. White has an advantage. Usually, this is enough to justify the sacrifice of the rook. But, in this position, there are even more options.
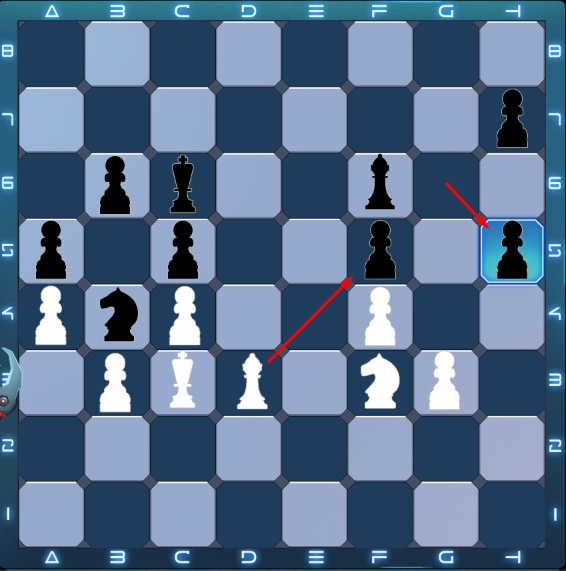
Following the arrows in the picture and sacrificing another rook, White has another passed pawn:
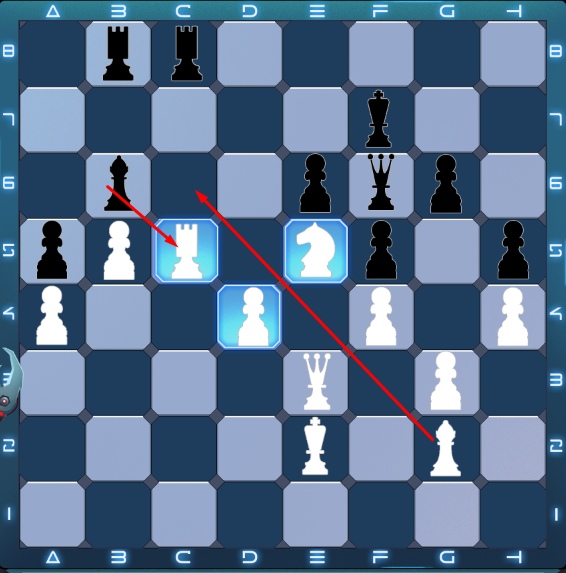
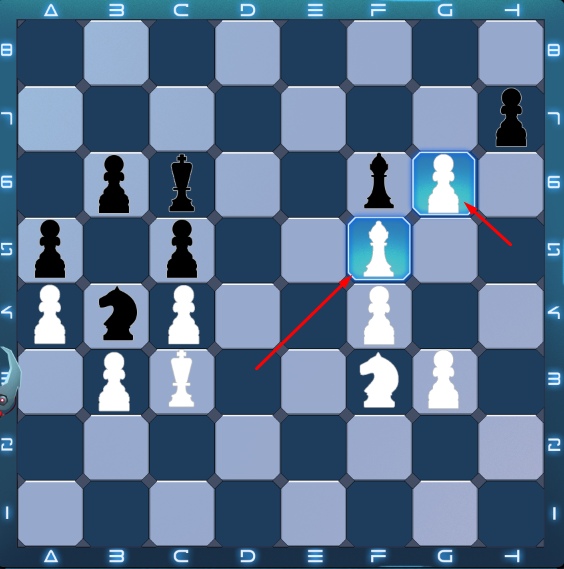
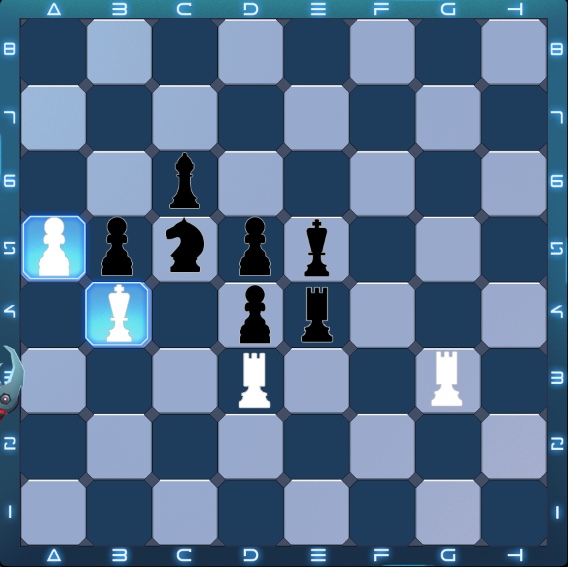
The white bishop move, as indicated in the picture, does not allow the black rook to protect the black bishop:
White easily wins. Only two sacrifices were enough, so do not be afraid to sacrifice a rook.
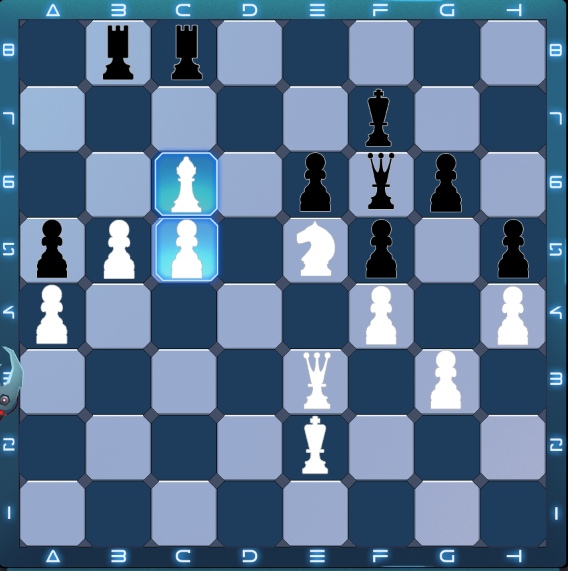
Sacrifices number 3. (Feint)
This is also one of the very common tricks. Why a feint? Since it’s hard to call him a sacrifice. White will quickly restore the pawn:
The pawn move, as indicated in the picture, undermines the protection of the pawn f. As a result, we get 2 positions:
Thus, we get a passing pawn for White and double pawns for Black, which can be easily attacked. As an alternative, it can be assumed that Black will reject the sacrifice and lose three pawns:
White takes both pawns at the same time and as a result during the exchange captures three black pawns.
Sacrifice No. 4 (Sacrifice of a knight/bishop for two pawns)
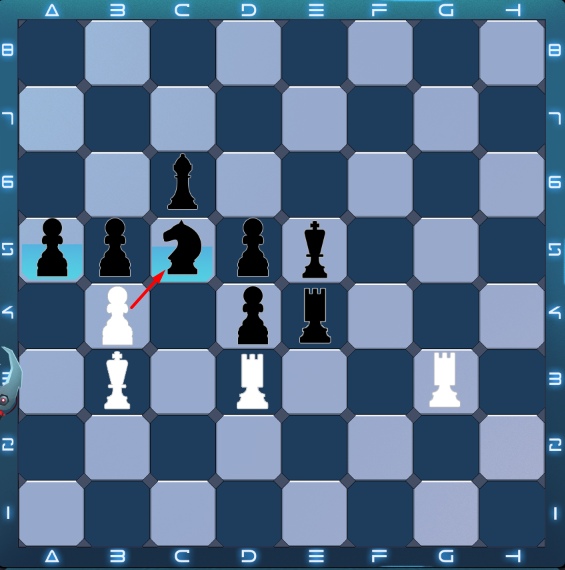
Black has an advantage, but his pieces were thoughtlessly placed, and the double central pawn does not allow attacking pawns located on the queenside. However, White’s position is even worse the Re3 move would be a great blow, opening the pawns a passage if White’s rooks did not stand in the places where they now stand. The game on the kingside for a white rook is prohibited since it performs a protective function. Therefore, black can win the game as follows:
- ... Nxc5 and a5
This is a destructive move and very well brings victory to Black. Perhaps for White, the best move would be 2. Bxa5 and kb4 ...
After which Black aims at 2 ... Na6 and Kd6. At the same time, remember that White should immediately exchange for d4, while Black attacks the remaining pawn. Black is left with one bishop, a knight and two pawns against a single white rook - a good perspective for ending the game.
However, what White actually played was 2. bxc5 thus releasing two passed pawns on the queenside, effectively sealing their fate:
Black answered this with the move 2 ... b4 and b5:

Sensing that square c3 would be occupied by the white king to fulfill a protective function, Black moved the pawn along line b to prevent this square from being occupied. The bishop has a threefold function: attack the d3 square in an attempt to undermine the rook support, protect the pawn moving on c6, and the king moving on a4. From this moment it can be considered that victory is in the hands of blacks. All they have to do is move the king to attack White’s last pawn (as shown in the picture), and White can move with a rook. If White went rook after Black went king, then Black would go 3 ... Bc4, thereby sacrificing the a-pawn, but then it is necessary to bring one of the pawns (d or b) to the last horizontal, otherwise White will again defend the position. If White had thrown all his forces into the attack, and both rooks had taken up a defensive position for the passed pawn, then the sacrifice of the rook and bishop would have come in handy and would have reduced the danger for Black's pawns that advanced to the last horizontal.
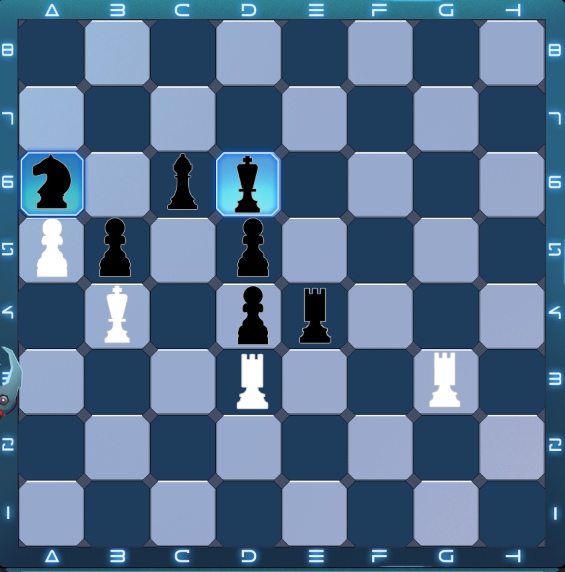
In fact, of course, this situation did not happen and Black managed to attack the pawn with. Two passed pawns of the queenside - under protection, the bishop and king also stand in a defensive position. As a result, White was trapped on his last horizontal:
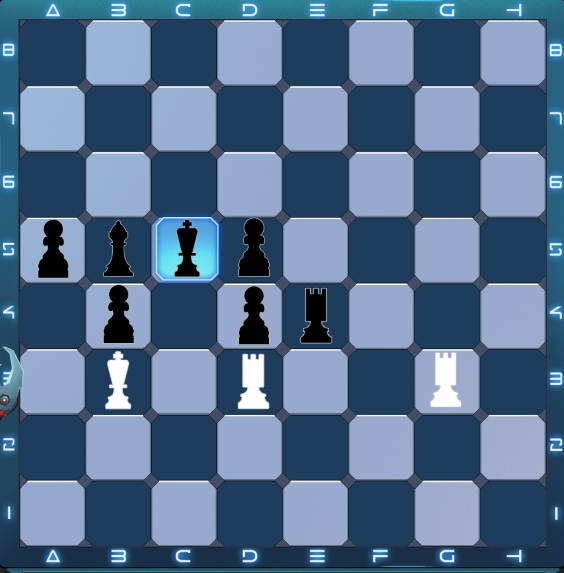
So, what did we get from the above? When Black sacrificed their knight, some players would be surprised that Black left the pawn unprotected. However, as shown in the picture, the knight sacrifice was made on purpose and helped Black win the game. Returning a knight for a pawn brought much more advantages in the game than just two passed pawns. I would like to say that it is sometimes beneficial to sacrifice a piece if it brings a positional advantage or creates a passed pawn. Noticed a profitable move with the sacrifice of a piece, proceed.
Strategy Examples in Click-Storm Action Chess. Part 7
Other Click-Storm Action Chess content is in the article below:

Last Opinions